Complete End-to-End Web Integration Guide
Overview
Sensfrx is a fraud prevention platform that uses cognitive intelligence technology to identify harmful activities such as risky logins, fake registrations, fraudulent transactions, and other suspicious actions. You can integrate Sensfrx into your web application to reduce the risk of fraud.
The goal of this guide is to help you correctly configure Sensfrx and achieve your security goals. The integration is divided into steps that are:
Step 1: Create and setup your account
Step 2: Add your property
Step 3: Code Integration (Client-Side SDK)
3.1: Phase I
Step 4: Code Integration (Server-Side SDK)
4.2: Phase II
Step 1: Create and Setup your account
If you already have an account, please proceed to Step 2.
1.1 Sign up for a free trail to get started and enter all the details as required and you will receive a link in your email.
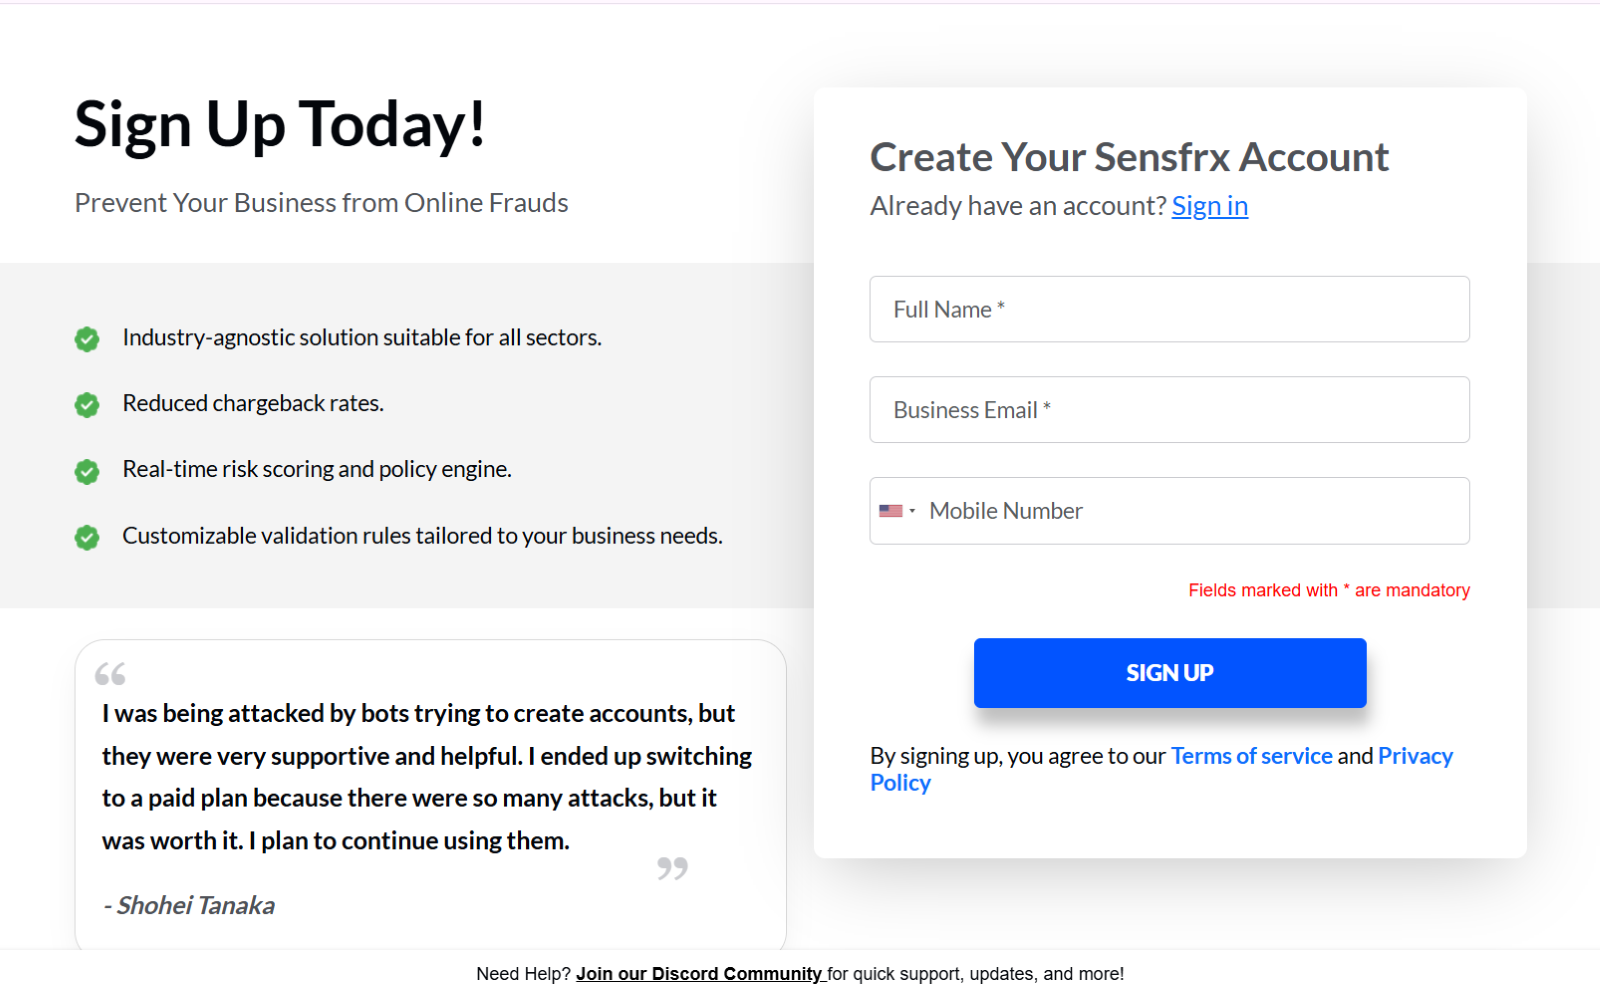
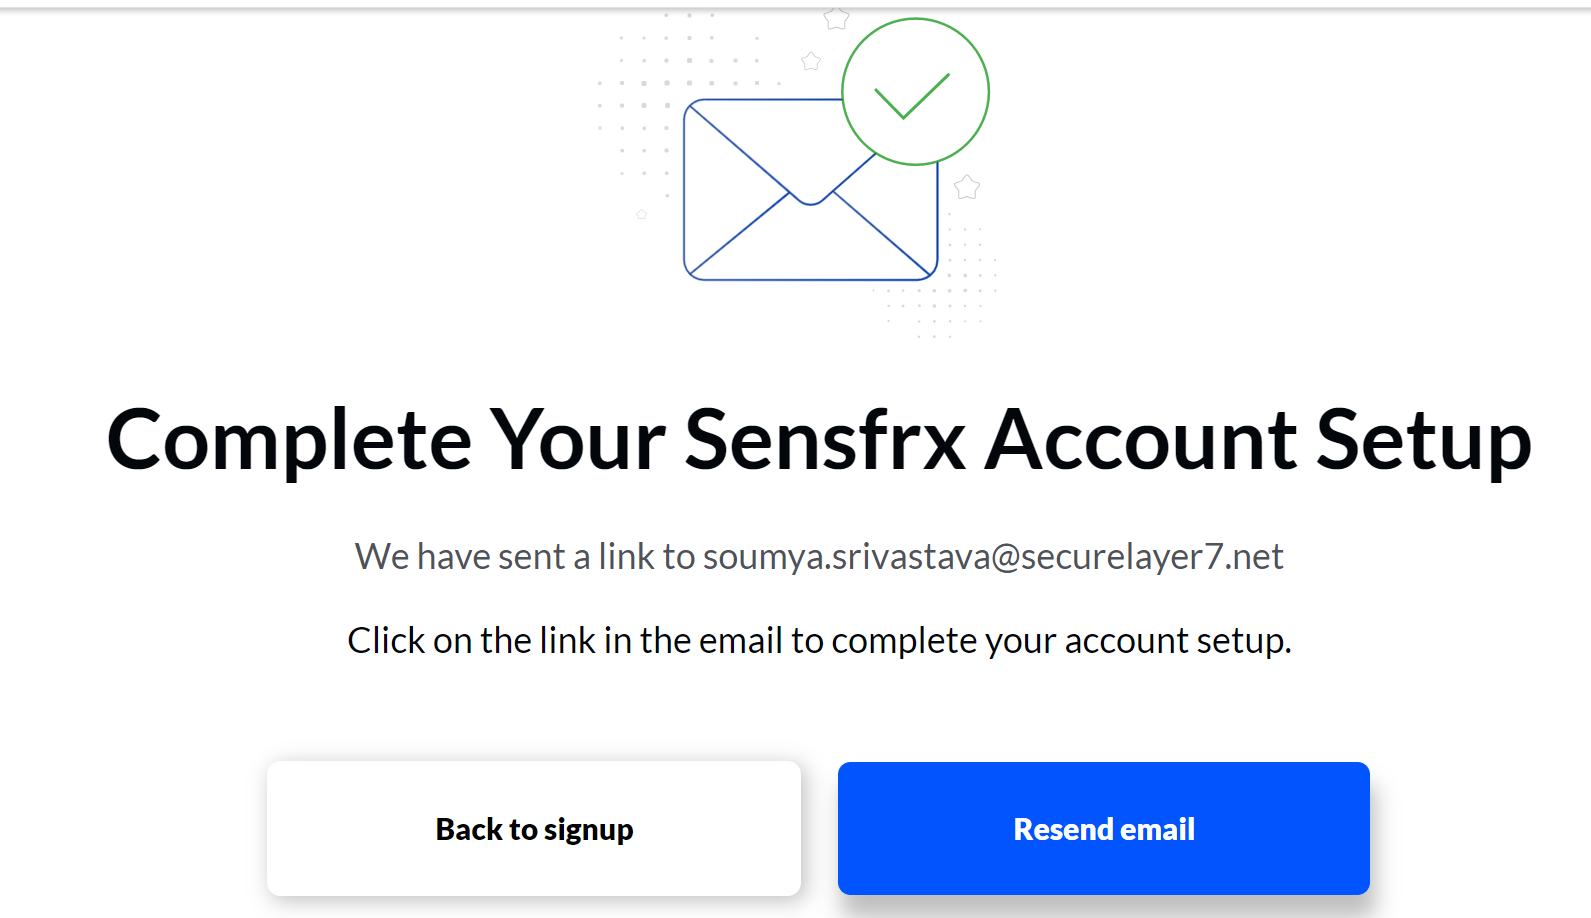
Image depicting the screen after creating an account on Sensfrx
1.2 You will receive an email on your registered email ID, and click on the link provided.
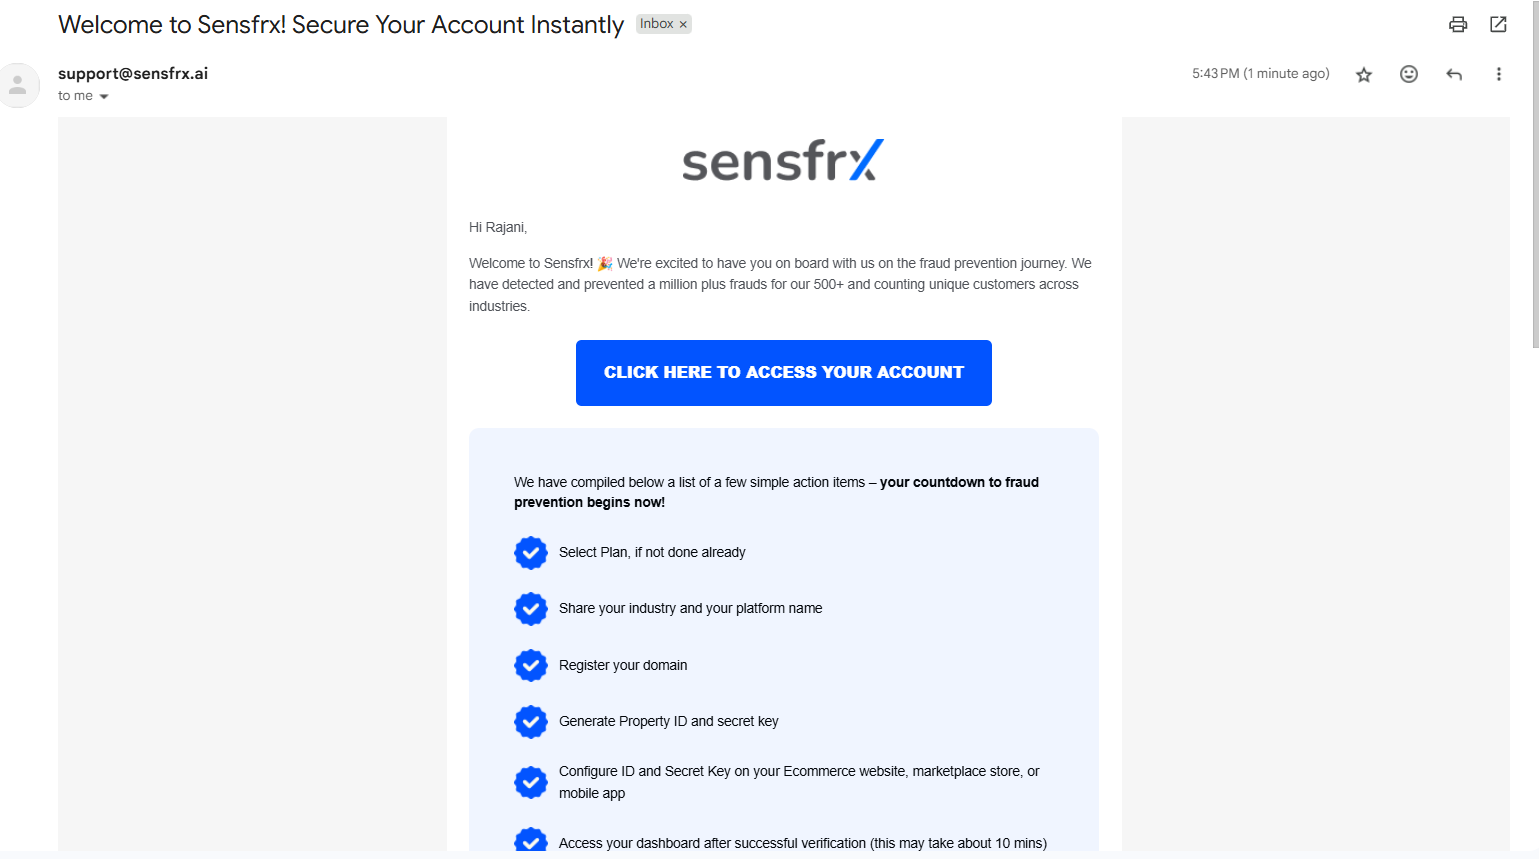
1.3 Once you click on the link received in the email the below window will appear where you will need to click on the Start Onboarding button.
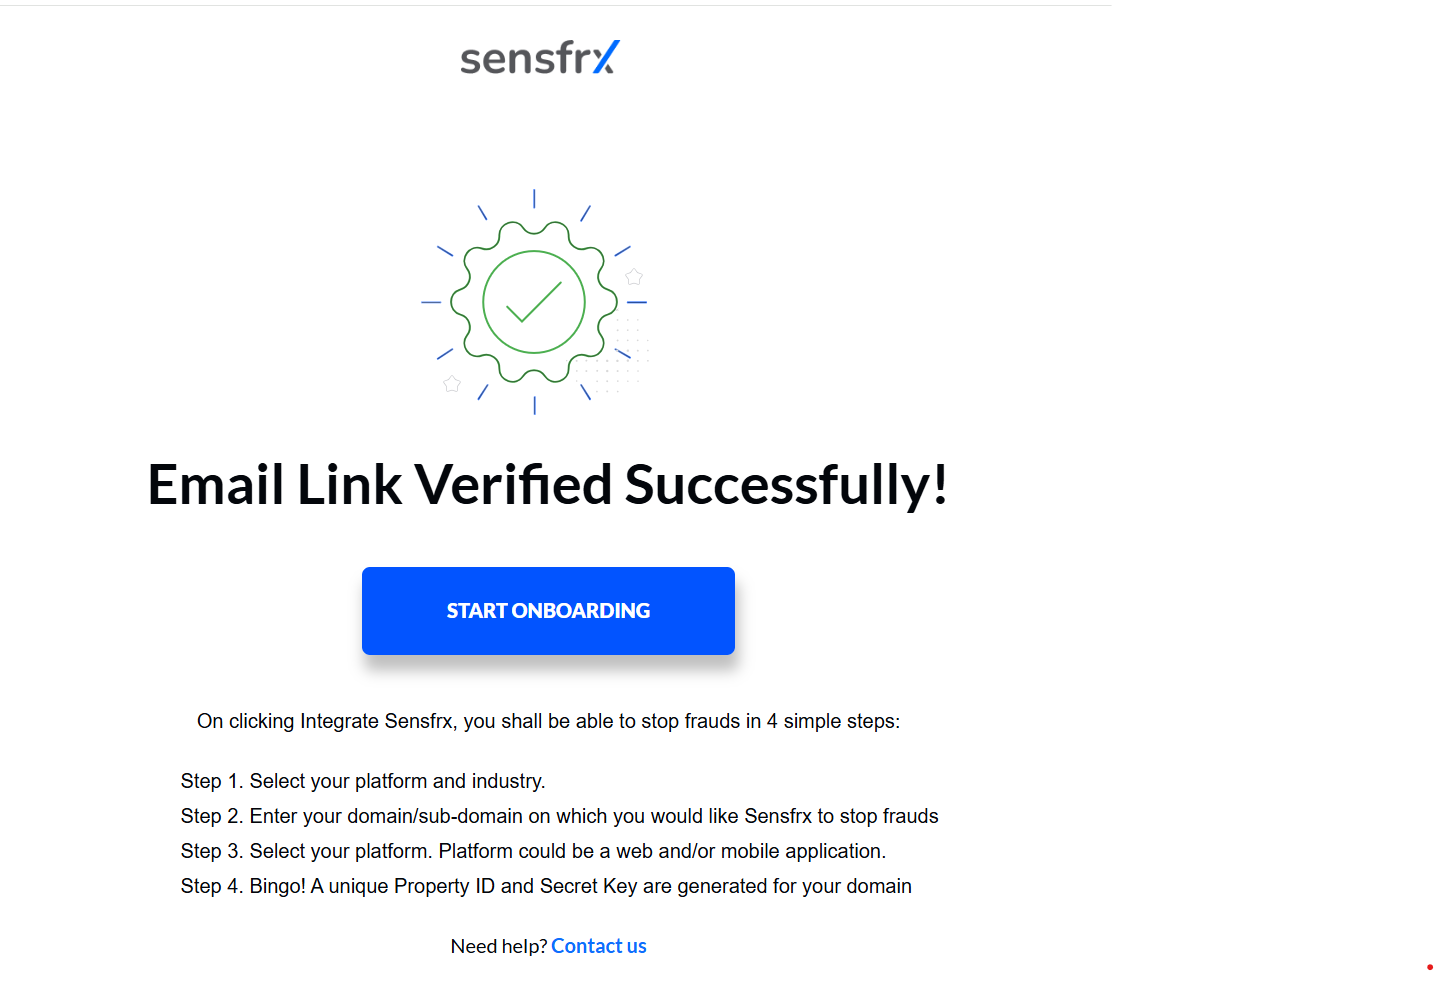
Image depicting the screen after clicking on the link received in the email
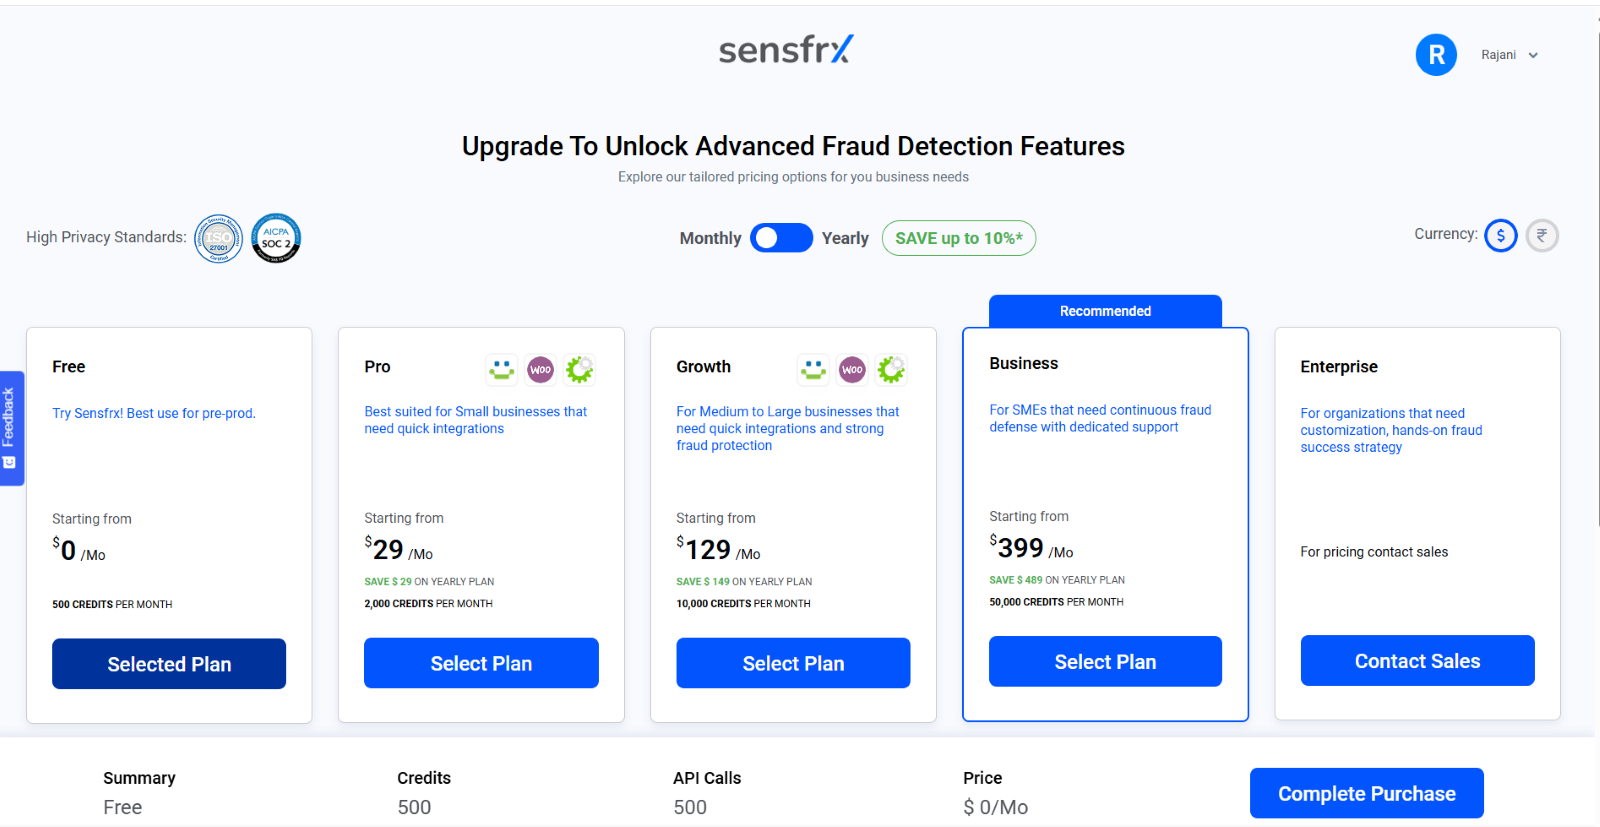
1.4 After clicking Start onboarding, you will need to select the plan and click on Complete purchase.
1.5 Select the application type applicable to you, select your respective industry from the dropdown, and click Next.
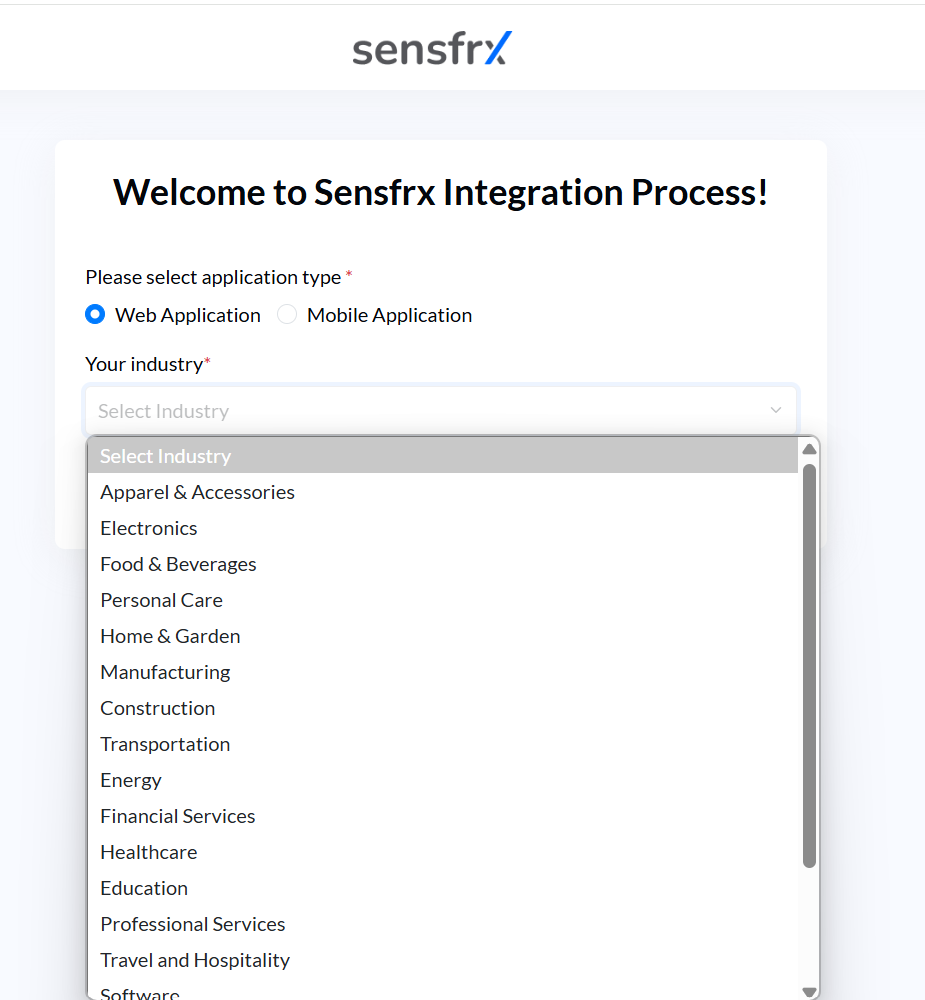
Image depicting the second screen of integrating your property
1.6 Enter the website domain name, select the application type applicable to your web application, select Yes/No
1.6.1 If you select No, click Start Integration.
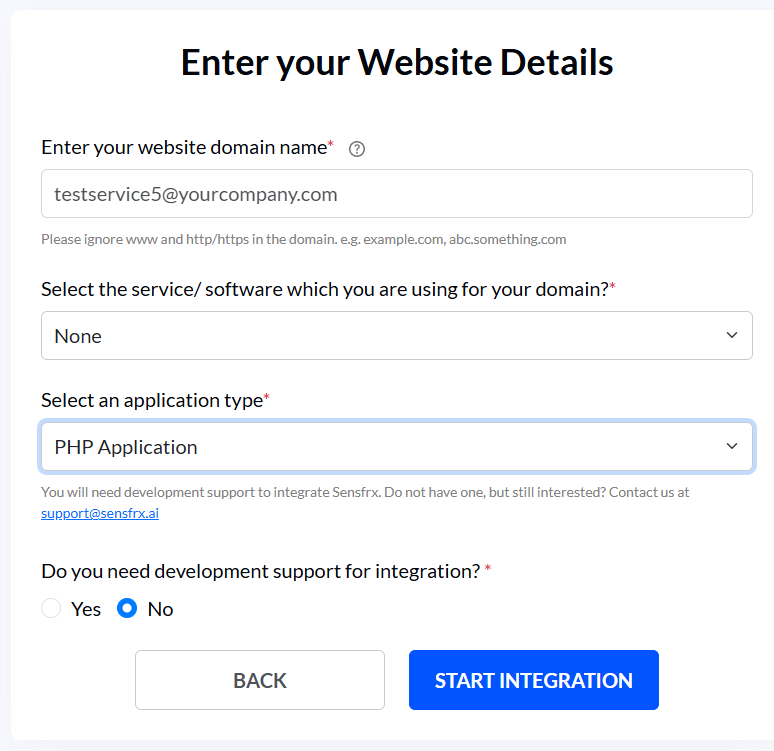
Image depicting a screen where the user enters their website details and selects No
1.6.2 If you select Yes, you can click on the Contact Us button to connect with our team.
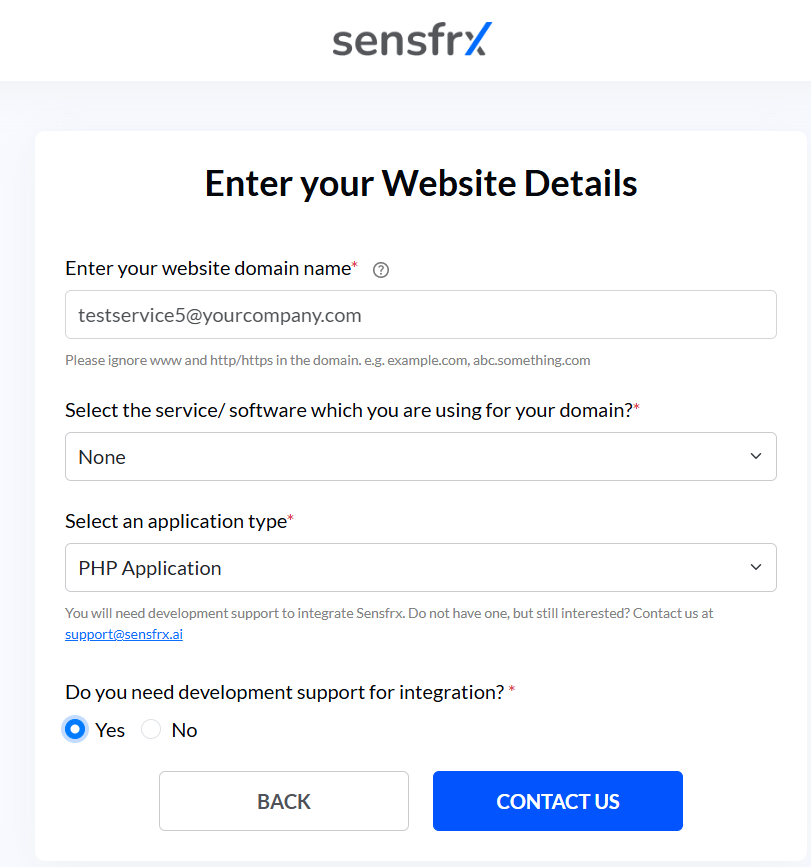
Image depicting a screen where the user enters their website details and select Yes

Image depicting the pop-up that appears when User clicks on Contact Us
Step 2: Add your property (License Keys)
If you already have a property ID and property secret, please proceed to Step 3. If not, continue reading for further instructions.
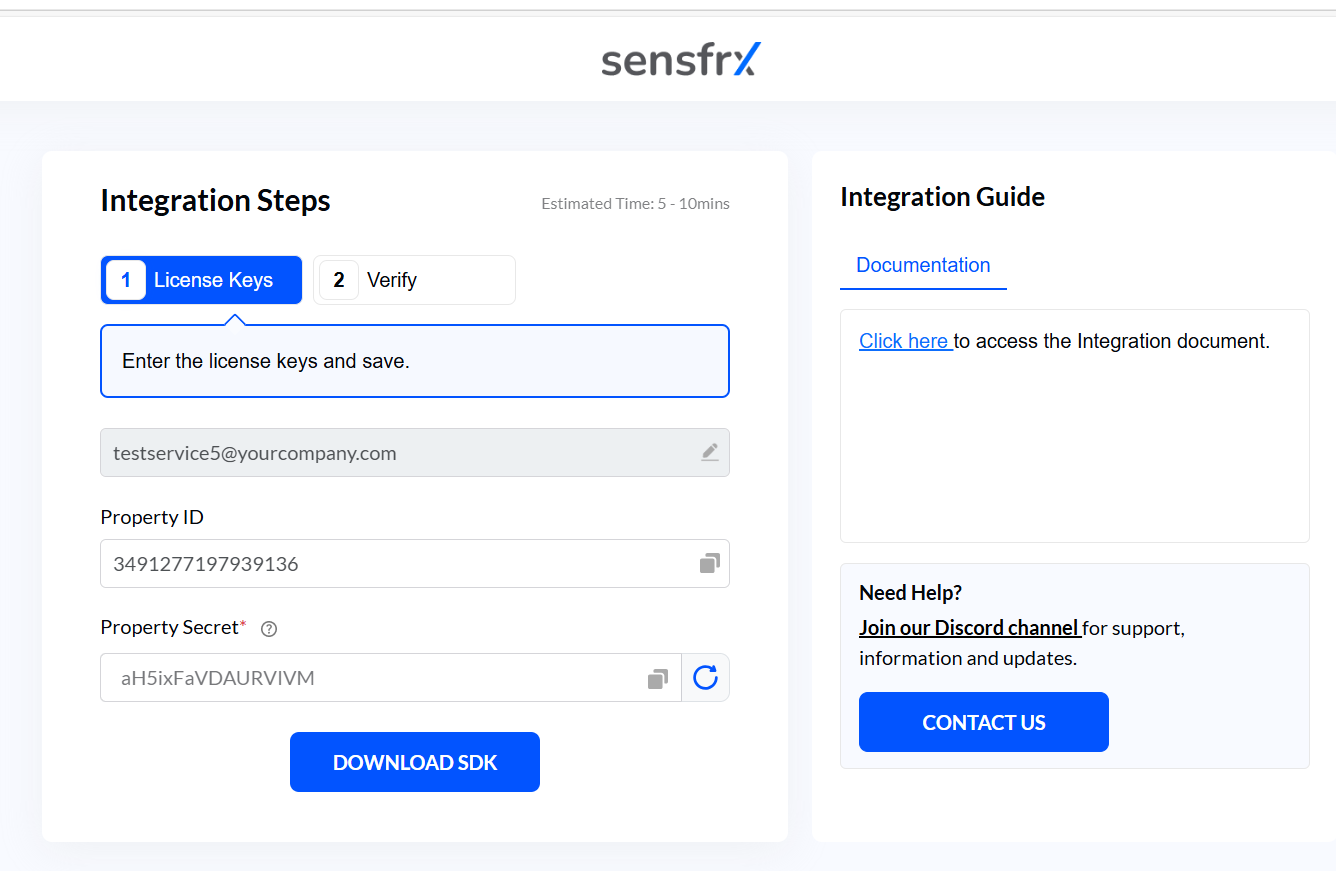
2.1 The Property ID field and the property secret fields will be pre-filled, and you will copy them using the copy button in the right corner. You can also change the property secret using the refresh button.
2.2 After copying the property secret and property ID, click on the Download SDK button.
Note: The SDK will be required during server-side configuration explained in Step 4.
Step 3: Code Integration (Client-side SDK)
After setting up your account and obtaining your property ID and property secret, you will need to integrate the code into your web application. This includes configuring both the client-side and server-side SDKs.
To integrate the Sensfrx client-side SDK into your web application you will need to integrate our Pixel file.
Pixel file: A pixel file is a small piece of code to track user activity like browsing pages, exploring various products online and other similar functions that helps to conduct User and entity behavioral analysis to create identity profile and gather device fingerprinting data.
3.1: Phase I – Pixel Integration
For a Web application, Users need to include the following JavaScript snippet:
<script src="https://p.Sensfrx.ai/as.js?p={PROPERTY ID}"></script> It needs to be included in the <head> tag just before the head closing tag </head>.
In the script, replace the PROPERTY ID with your Property ID value. Click here to know how to generate property ID and secret key.
Note: Since property ID is a unique value so ensure that you always have it saved.
Secondly, the User needs to be initialized.
<script> _Sensfrx("userInit", <userid>); </script> Note: This line needs to be called only when the user is logged in, the rest of the time it does not need to be called.
Step 4: Code Integration (Server-Side Configuration)
After completing the client-side configuration, the next step is to configure the server side.
4.1: Phase II – Getting Request String
Execute the following JavaScript integration script to get request string.
<script> var as_request_string = _Sensfrx("getRequestString"); </script> Note: The above request string is required in all the api requests. _Sensfrx() is a global function and can be called anywhere after the library is included in the code.
There are two ways to perform integration on server-side code:
SDK: Software Development Kits (SDKs) ease the integration process, and the detailed explanation is given in the next section.
REST API: If you do not want to use SDKs, then you can choose the REST APIs which can be directly integrated on the server-side. Refer how to integrate Sensfrx using REST API.
Prerequisites for installing the APIs
Prior expertise in API to ensure correct API integration.
Handle data securely as the API transmits PII.
Must have a Sensfrx API Key.
Understanding of your registration, login and checkout flow.
Must provide the IPs to Sensfrx for whitelisting.
Below is the step-by-step process of the SDK integration that involves:
SDK integration
SDK functions integration
Note: The following section contains code snippets for the PHP codebase. If you don’t h have a PHP application, you can go ahead with Rest APIs integration.
4.1: SDK integration
The below steps will guide you on how to integrate the Sensfrx SDK into your existing web application codebase:
Click on the DOWNLOAD SDK button to download if you haven’t yet.

2. Extract the downloaded SDK from your system and copy the Sensfrx folder in your PHP directory.

Add the below lines to your code to instantiate the SDK:
require_once("PATH TO SENSFRX PHP SDK/Sensfrx-php-sdk/Sensfrx/autoload.php");
obj = new Sensfrx\Sensfrx([ 'property_id' => '1234567891234567', 'property_secret' =>'xxxxxxxxxxxxxxxx']);
Note: Instead of required_once, users can call the autoloader any other way they want. Users need to call it first before calling any APIs or functions.
Click here to know how to generate property ID and property secret key.
4.2 Include the SDK functions
Sensfrx SDK platform offers five major functions for calling the APIs, which users can select based on their requirements.
Below are the code snippets that you can include in your codebase to include the respective functions:
4.2.1 Login Attempt:
The login attempt function handles login attempts, recording both successful and failed logins.
Integrate the below code into your codebase to call the login attempt API:
$res = $obj->loginAttempt( STATUS, USERID, as_request_string, array( 'email' => 'test@gmail.com', 'username' => $username,'phone'=>$phone,'password'=>$hashpassword ));To get a detailed understanding of the login attempt function visit the Server-side SDK page.
4.2.2 Register Attempt:
The Register Attempt function handles the evaluation of risk associated with new user registration attempts, allowing for the detection and prevention of fake or malicious registrations.
Integrate the below code into your codebase to call the register attempt API:
$res = $obj->registerAttempt( STATUS, as_request_string, array('email'=>$email,'name'=>$name,'phone'=>$phone,'password'=>$hashpassword ) ); To get a detailed understanding of the register attempt function visit the Server-side SDK page.
4.2.3 Reset Password Attempt:
The reset password attempt function handles the recording of successful password reset attempts, allowing for the evaluation of the risk associated with these events.
Integrate the below code into your codebase to call the Reset password attempt function:
$res = $obj->passwordResetAttempt ( STATUS, USERID, as_request_string, array( ’email’ => ‘test@gmail.com’, ‘username’ => $username ) );
To get a detailed understanding of the reset password attempt function visit the Server-side SDK page.
4.2.4 Transaction Attempt:
The transaction attempt function handles the evaluation of risk associated with transaction attempts, allowing for the detection and prevention of suspicious transactions.
The user should add the below code snippet to integrate the transaction attempt API:
$res = $obj->transactionAttempt( STATUS, as_request_string,
array( ‘user_id’ => $user_id,
’email’ => $email,
‘username’ => $username,
‘first_name’ => $first_name,
‘last_name’ => $last_name,
‘phone_no’ => $phone_no,
‘transaction_id’ => $transaction_id,
‘invoice_id’ => $invoice_id,
‘affiliate_id’ => $affiliate_id,
‘affiliate_name’ => $affiliate_name,
‘transaction_type’ => $transaction_type,
‘payment_mode’ => $payment_mode,
‘payment_provider’ => $payment_provider,
‘card_type’ => $card_type,
‘card_fullname’ => $card_fullname,
‘card_bin’ => $card_bin,
‘card_expire’ => $card_expire,
‘card_last’ => $card_last,
‘cvv’ => $cvv,
‘transaction_amount’ => $transaction_amount,
‘tax_amount’ => $tax_amount,
‘discount_amount’ => $discount_amount,
‘transaction_currency’ => $transaction_currency,
‘items’ => $items,
‘shipping_cost’ => $shipping_cost,
‘shipping_fullname’ => $shipping_fullname,
‘shipping_address’ => $shipping_address,
‘shipping_phone’ => $shipping_phone,
‘shipping_city’ => $shipping_city,
‘shipping_state’ => $shipping_state,
‘shipping_country’ => $shipping_country,
‘shipping_zip’ => $shipping_zip,
‘shipping_method’ => $shipping_method,
‘billing_address’ => $billing_address,
‘billing_phone’ => $billing_phone,
‘billing_city’ => $billing_city,
‘billing_state’ => $billing_state,
‘billing_country’ => $billing_country,
‘billing_zip’ => $billing_zip,
‘merchant_name’ => $merchant_name,
‘merchant_category’ => $merchant_category,
‘merchant_id’ => $merchant_id,
‘merchant_country’ => $merchant_country,
 ) );
To get a detailed understanding of the login attempt function visit the Server-side SDK page.
4.2.5 Bot Attempt:
The Bot Attempt API function handles the evaluation of risk associated with bot activities, enabling the detection and prevention of automated or malicious actions that could compromise system integrity.
The user should add the below code snippet to integrate the Bot attempt API:
$res = $obj->isBot( as_request_string, USERID ); To get a detailed understanding of the bot attempt function visit the Server-side SDK page.
After completing the client and server-side integration process, the user should click the Verify button to activate Sensfrx for tracking traffic on the application.
Once done, click CONFIRM and the User will be redirected to their dashboard.
Click here to understand your Sensfrx Dashboard.
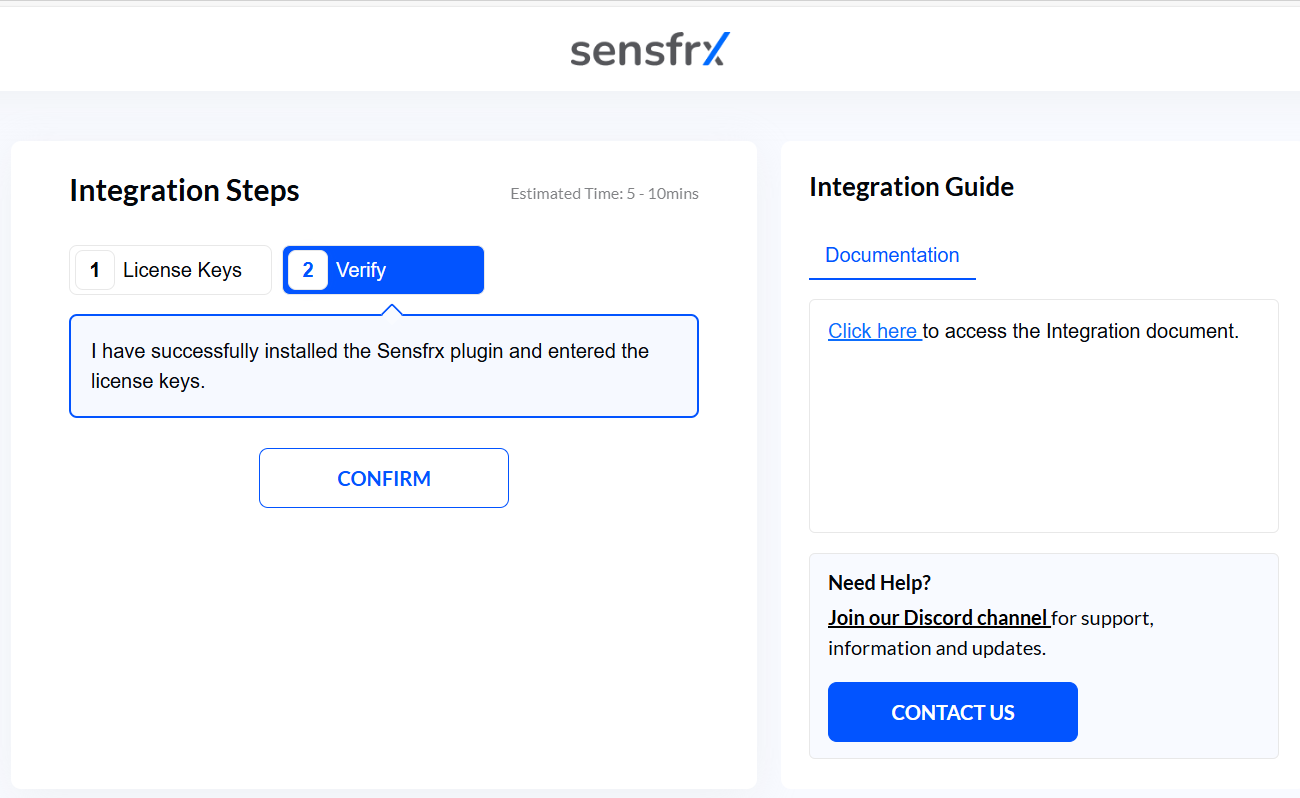
After successful verification, you will be redirected to your Sensfrx dashboard, where you can access all the data you need to protect your business from fraud.
Click here to explore the Sensfrx Dashboard and discover how it can elevate your fraud prevention efforts to the next level!