WISECP Extension
Sensfrx seamlessly integrates with WISECP, a client management and billing software widely used by web hosting companies. This extention enhances fraud detection capabilities on login, registration and order forms, ensuring a secure and smooth user experience.
Overview
This guide outlines the process for integrating Sensfrx with WISECP using the dedicated Sensfrx extension module. To incorporate Sensfrx into WISECP, users need to install and configure the corresponding module.
How Does the Sensfrx WISECP Extension Work?
When properly integrated with WISECP, Sensfrx provides proactive fraud prevention while maintaining user convenience. It quickly detects and blocks fraudulent activities in real-time, effectively protecting your business from online fraud.
You can configure the Sensfrx plugin in your WISECP web application by following the steps below:
Step 1: Create and set up your account
Step 2: Integrate WISECP Plugin
Step 3: Configure Fraud Policies
Pre-installation Requirements
WISECP requires PHP version 8.1 or higher.
Sensfrx’s Property ID & Property Secret Key
HTTPS support is required.
WISECP login credentials are necessary.
A memory limit of 8GB or higher is recommended
Sensfrx Fraud engine integration for WISECP
.svg)
Step 1: Create and setup your account
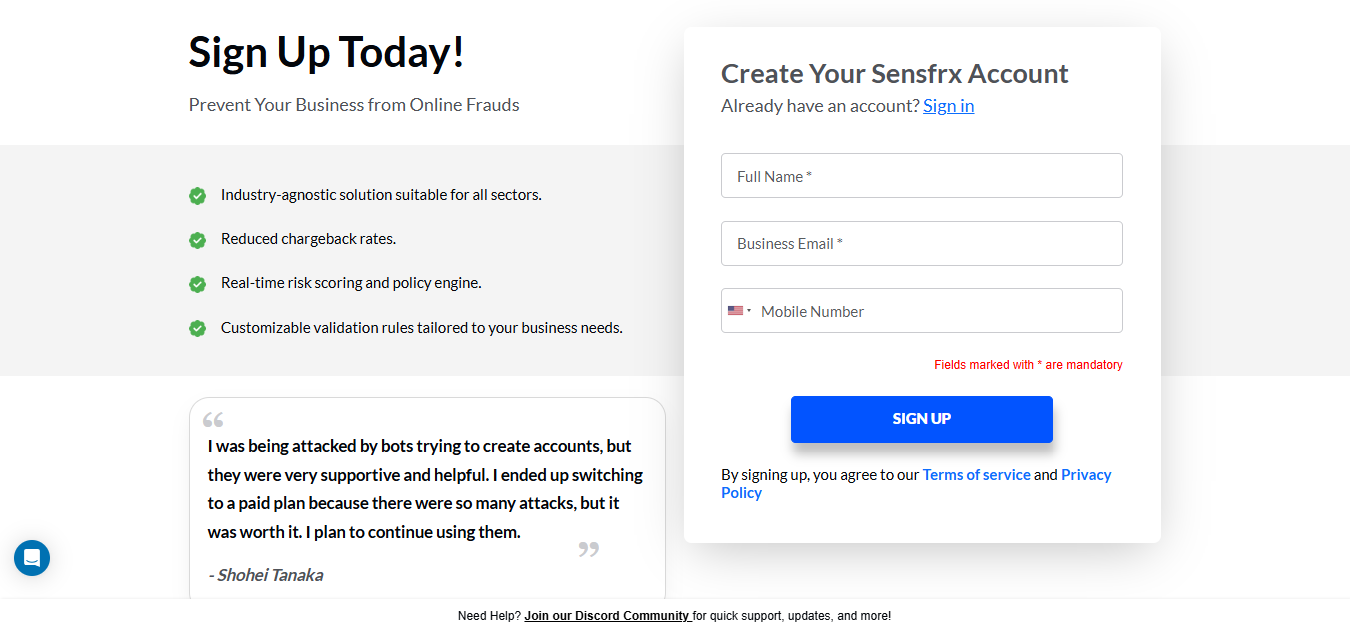
Visit website - https://sensfrx.ai/
Complete the registration form with your full name (e.g., James Wilson) and email address
Complete the email verification process
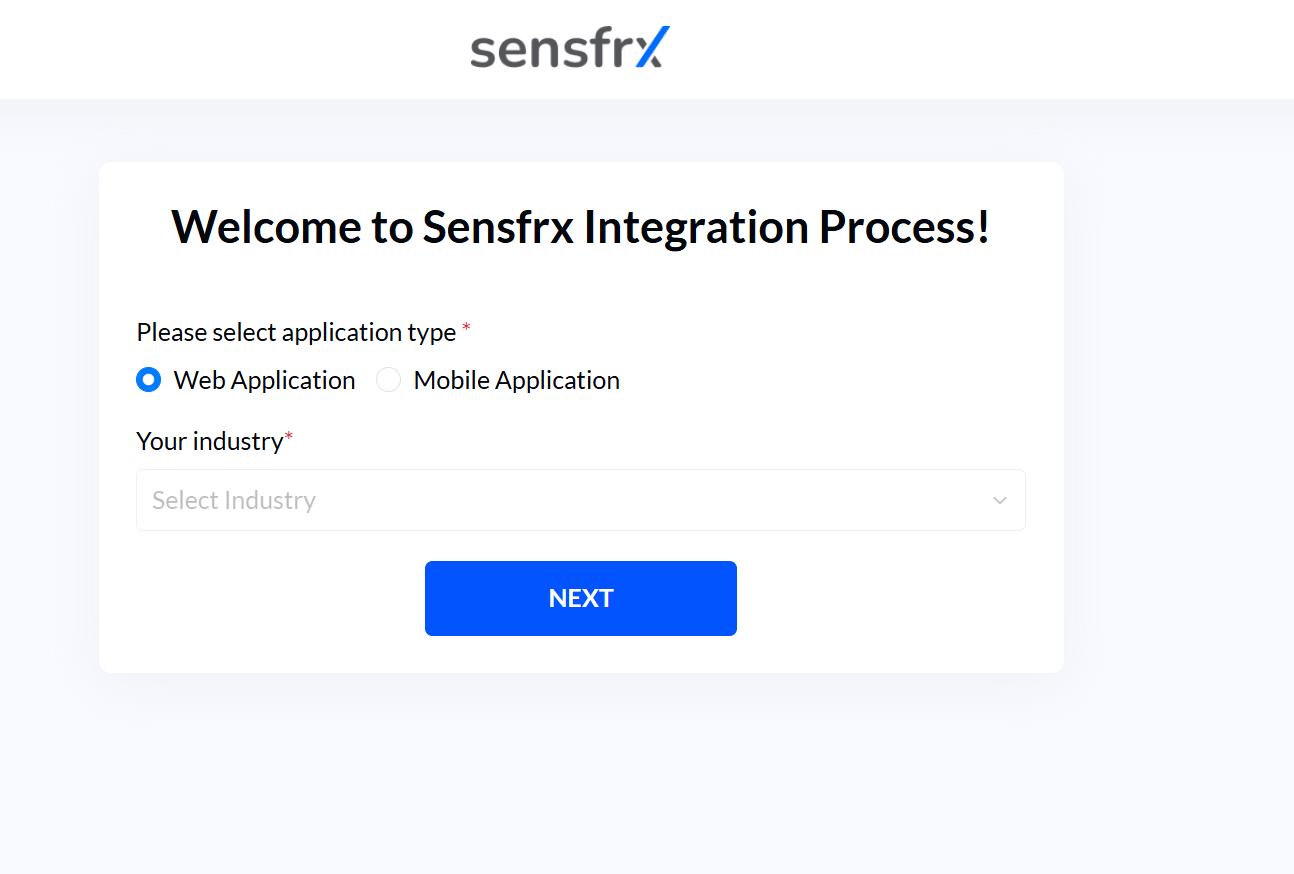
After completing the signup, email verification, and plan selection steps, please select web application, select your industry, and click 'Next' to proceed.
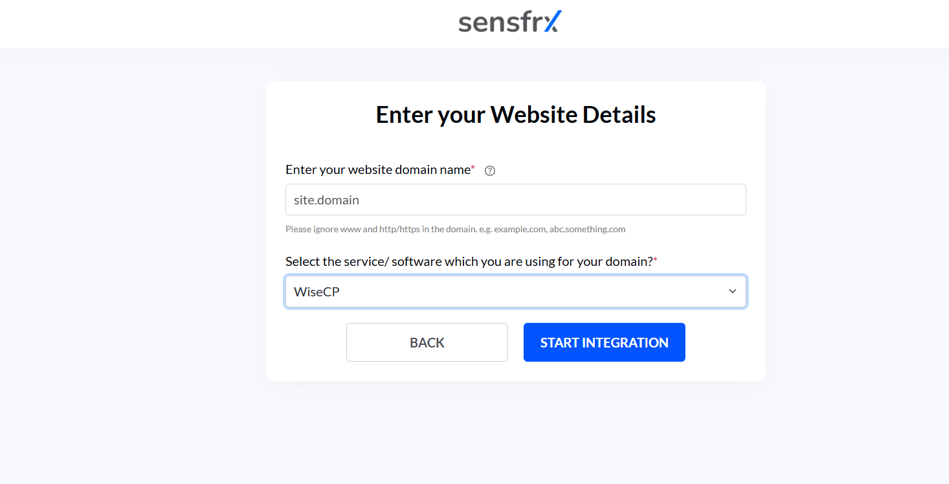
Enter the domain of your web application and from the dropdown list, select WISECP as your service for your domain and click on Start Integration.
Step 2: WISECP Plugin Integration
1. Download and Install the Plugin
Make sure you have met all the specified prerequisites before installing the Sensfrx WISECP plugin.
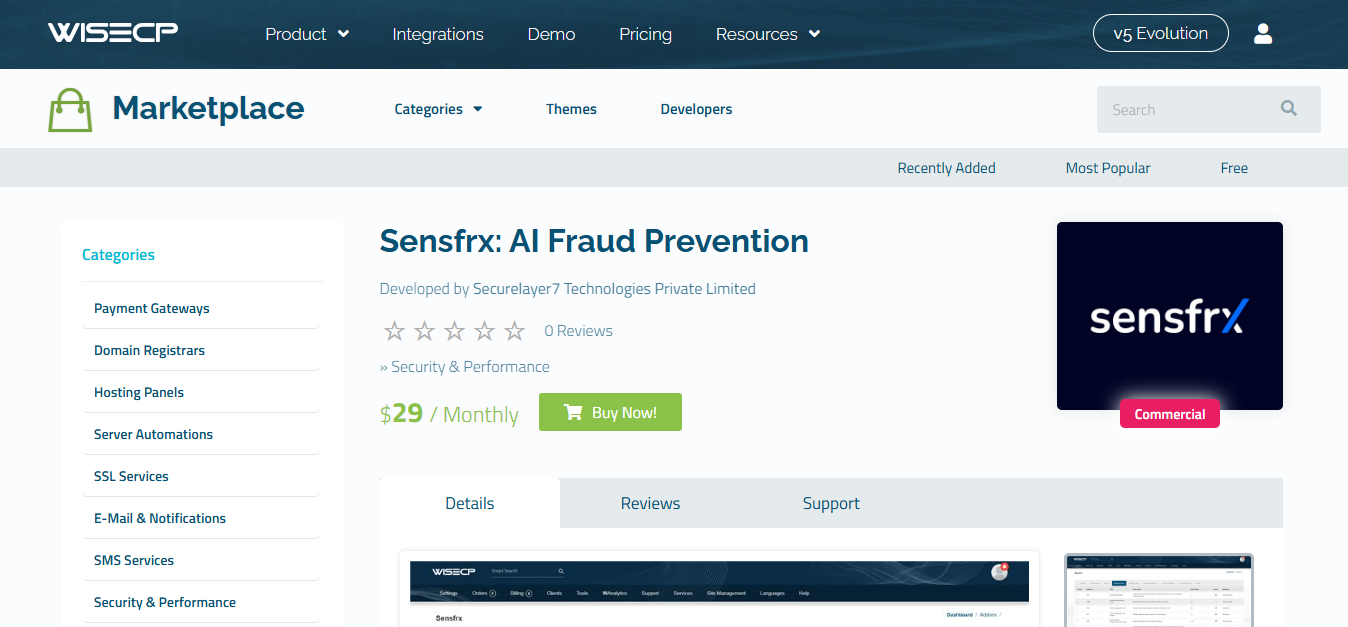
https://marketplace.wisecp.com/en/product/sensfrx-ai-fraud-prevention
Download the WISECP plugin from WISECP Marketplace.
Click to Get it Now button to download. The zip file will be saved to your system.
Extract the downloaded zip file from your system.
Upload the extracted folder to: wisecp_setup/modules/addons/sensfrx
Login to your WISECP Admin account.
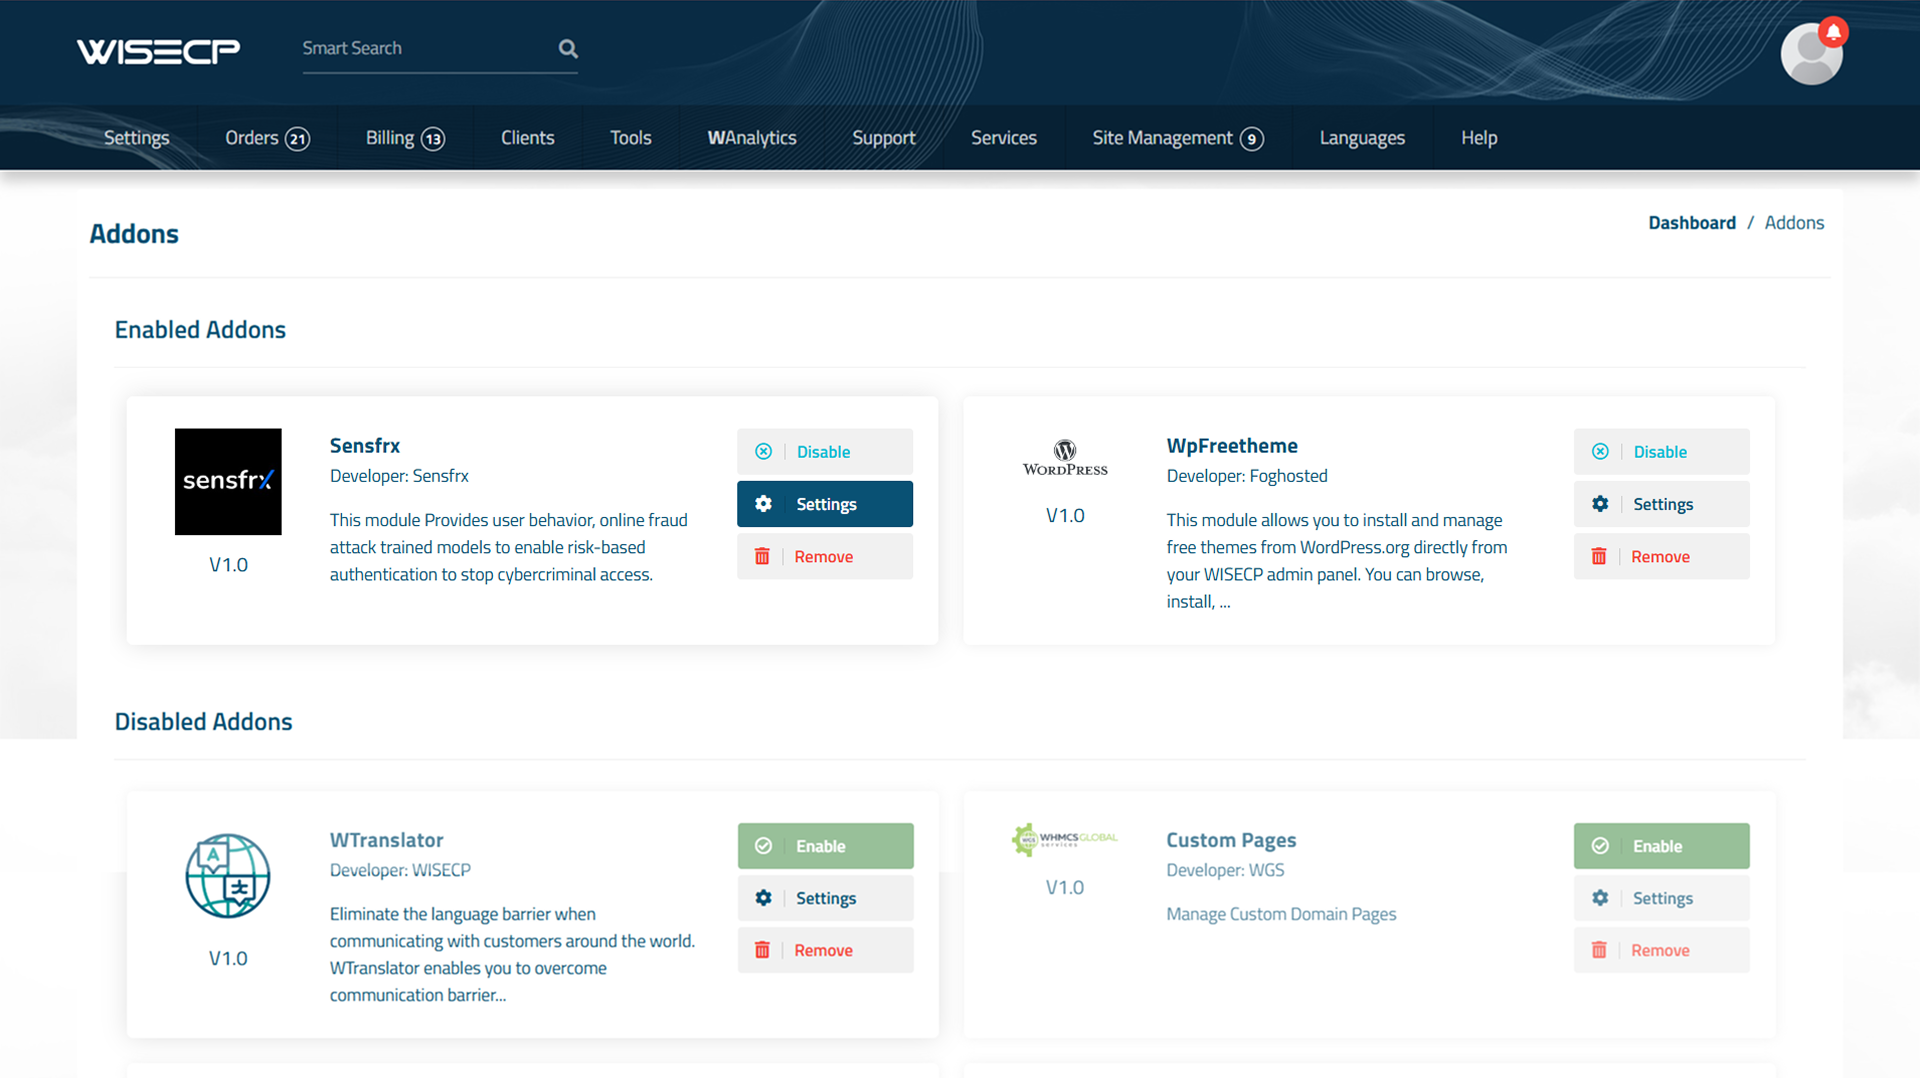
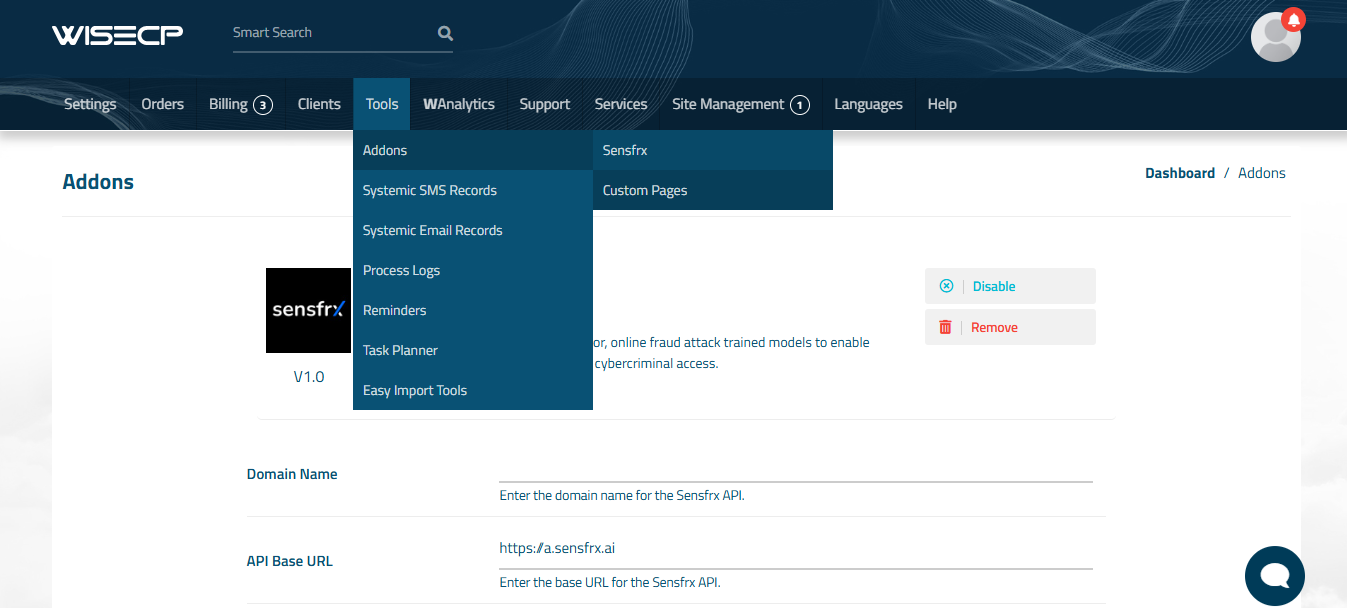
Navigate to Tools > Addons. Find the Sensfrx add-on module in the list.
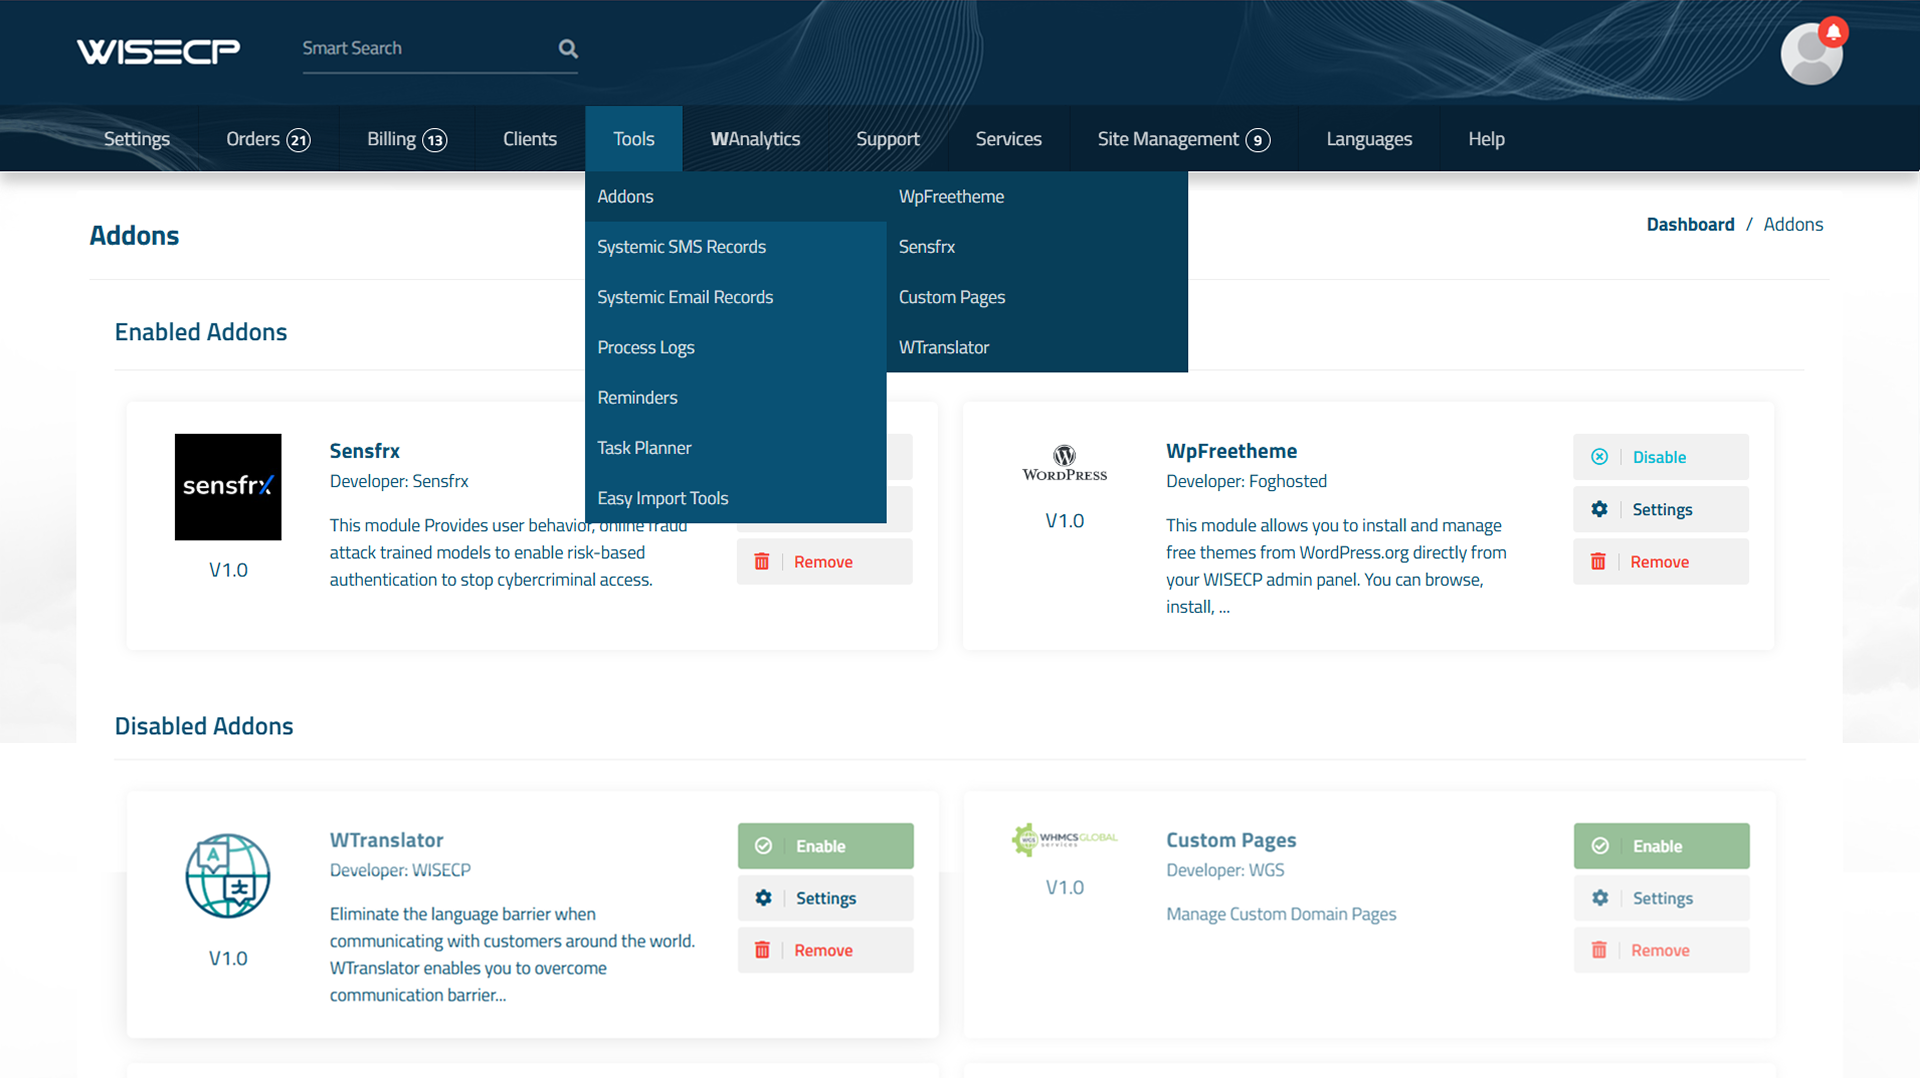
Click on the Enable button next to Senfrx plugin to enable it.
2. Configure License Keys
Copy the Property ID & Property Secret
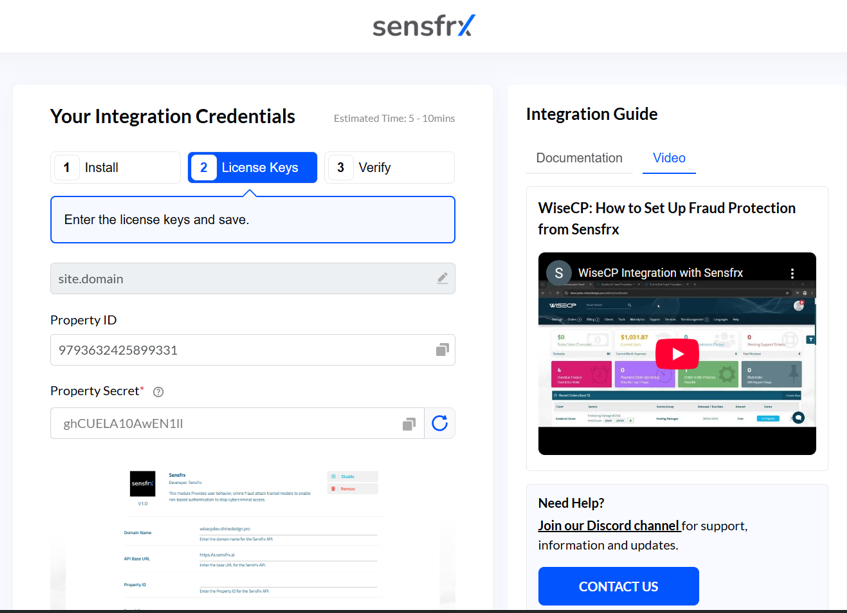
On the WISECP platform, click on the Settings button next to Sensfrx, to configure the credentials.
Enter the following details
Domain Name : Enter your domain name
Property ID : Enter your Property ID
Secret Key : Enter your Property Secret
In the access control section, select the admin role groups that you want to have access to this module.
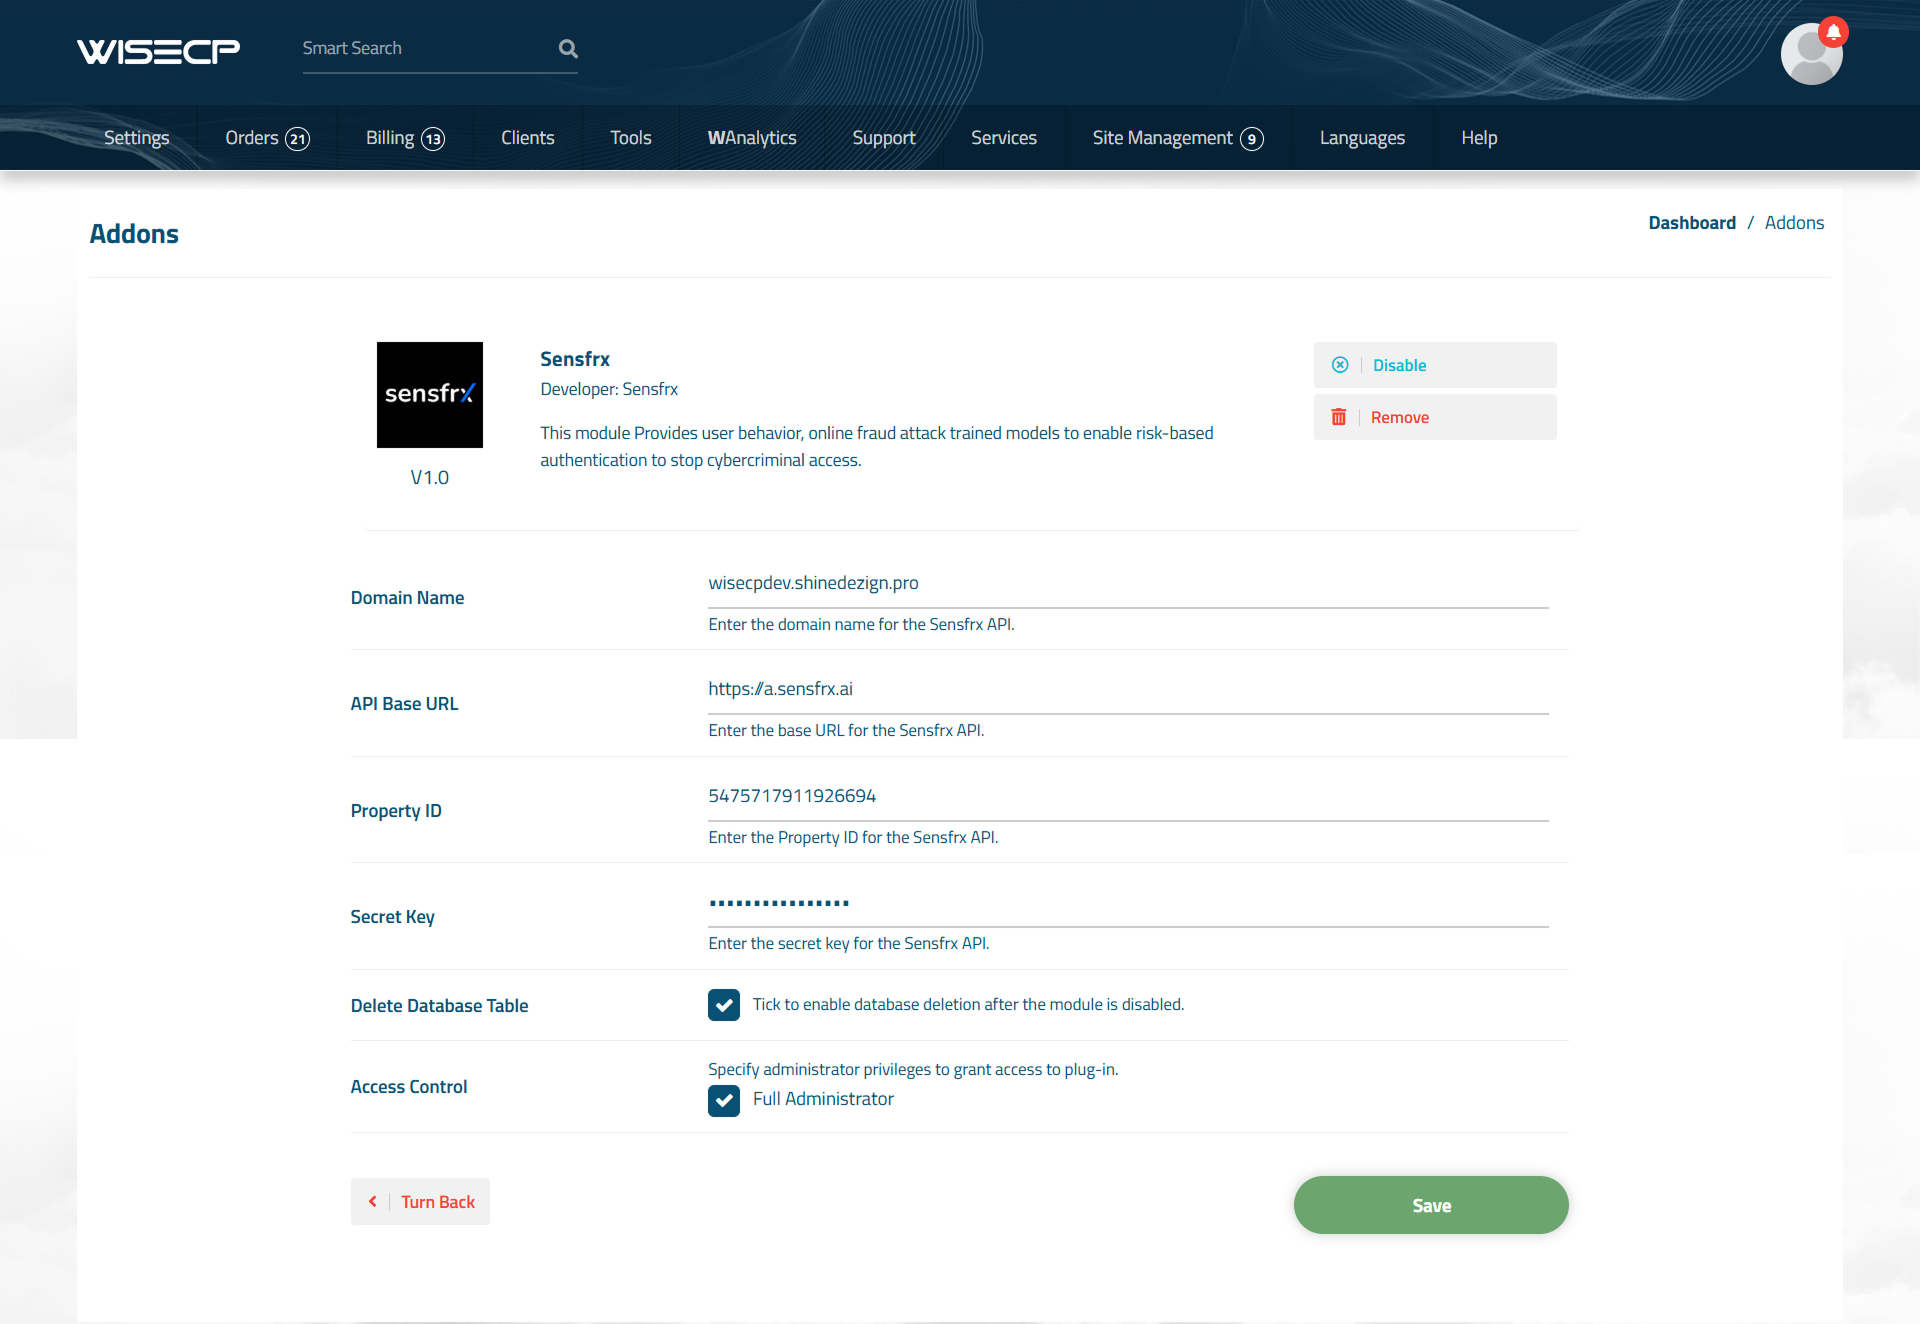
Once you have entered all the details, click “Save Changes” to save the configuration.
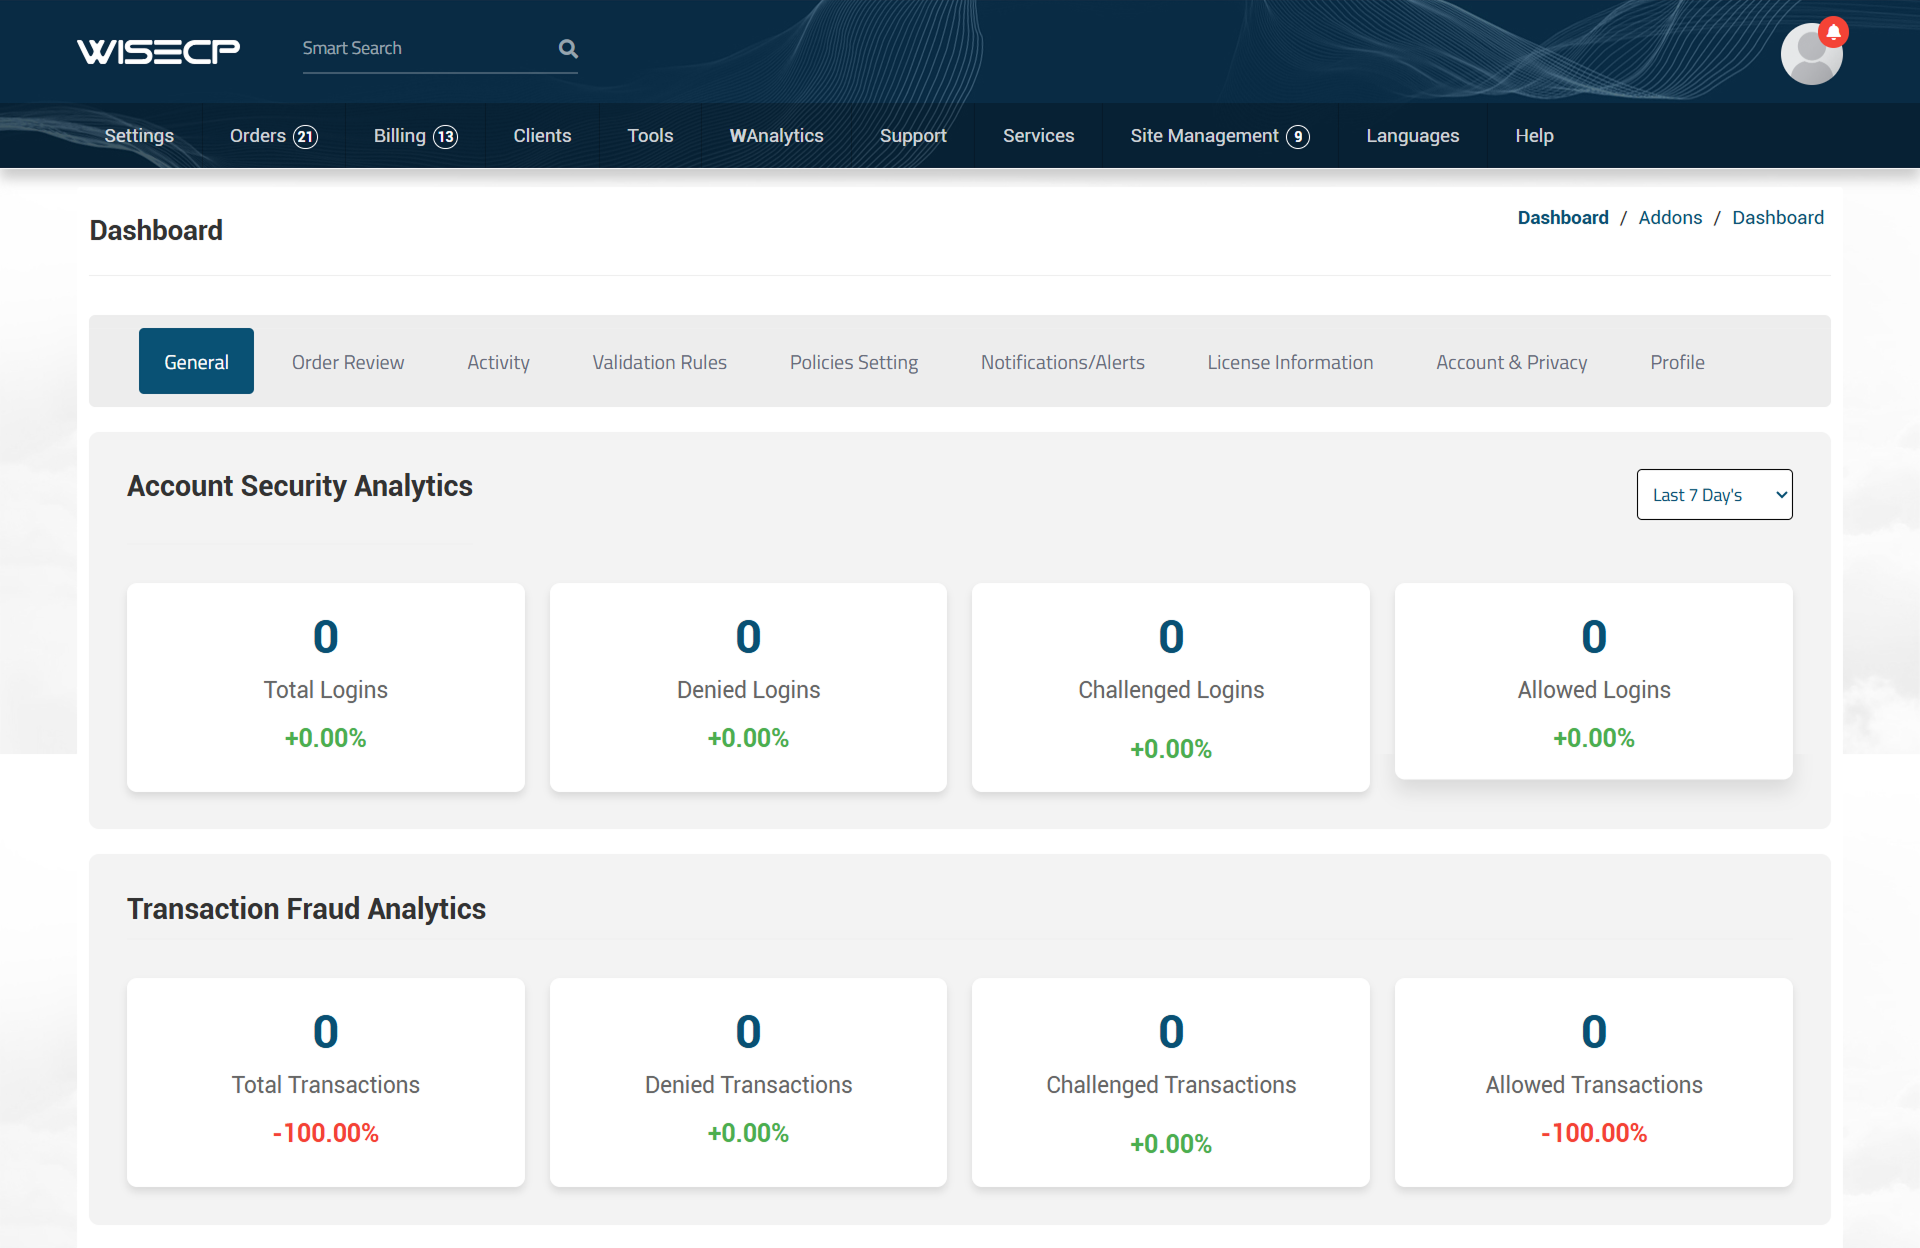
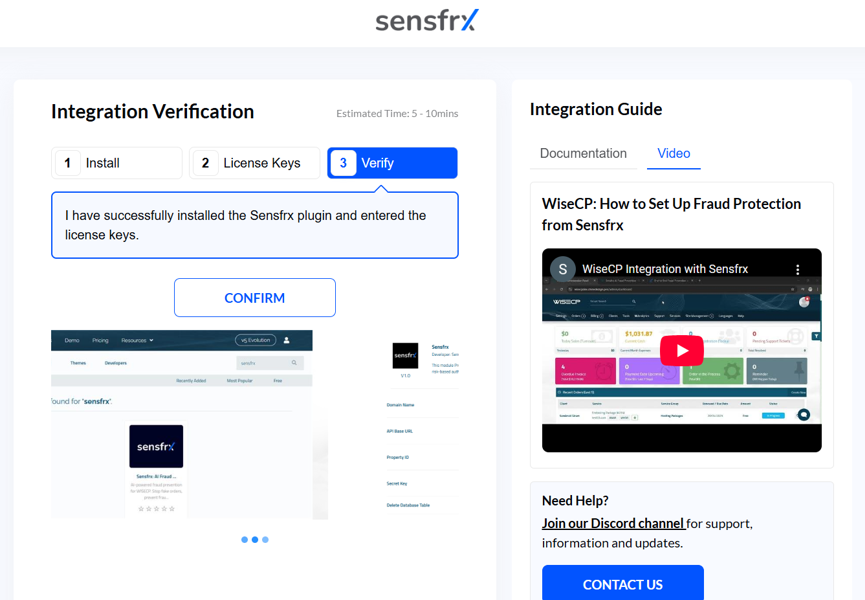
After successfully integrating WISECP plugin, you will begin to see traffic data on the Dashboard. You can then proceed to configure additional policies as needed.
3. To confirm successful integration, click the Confirm button.
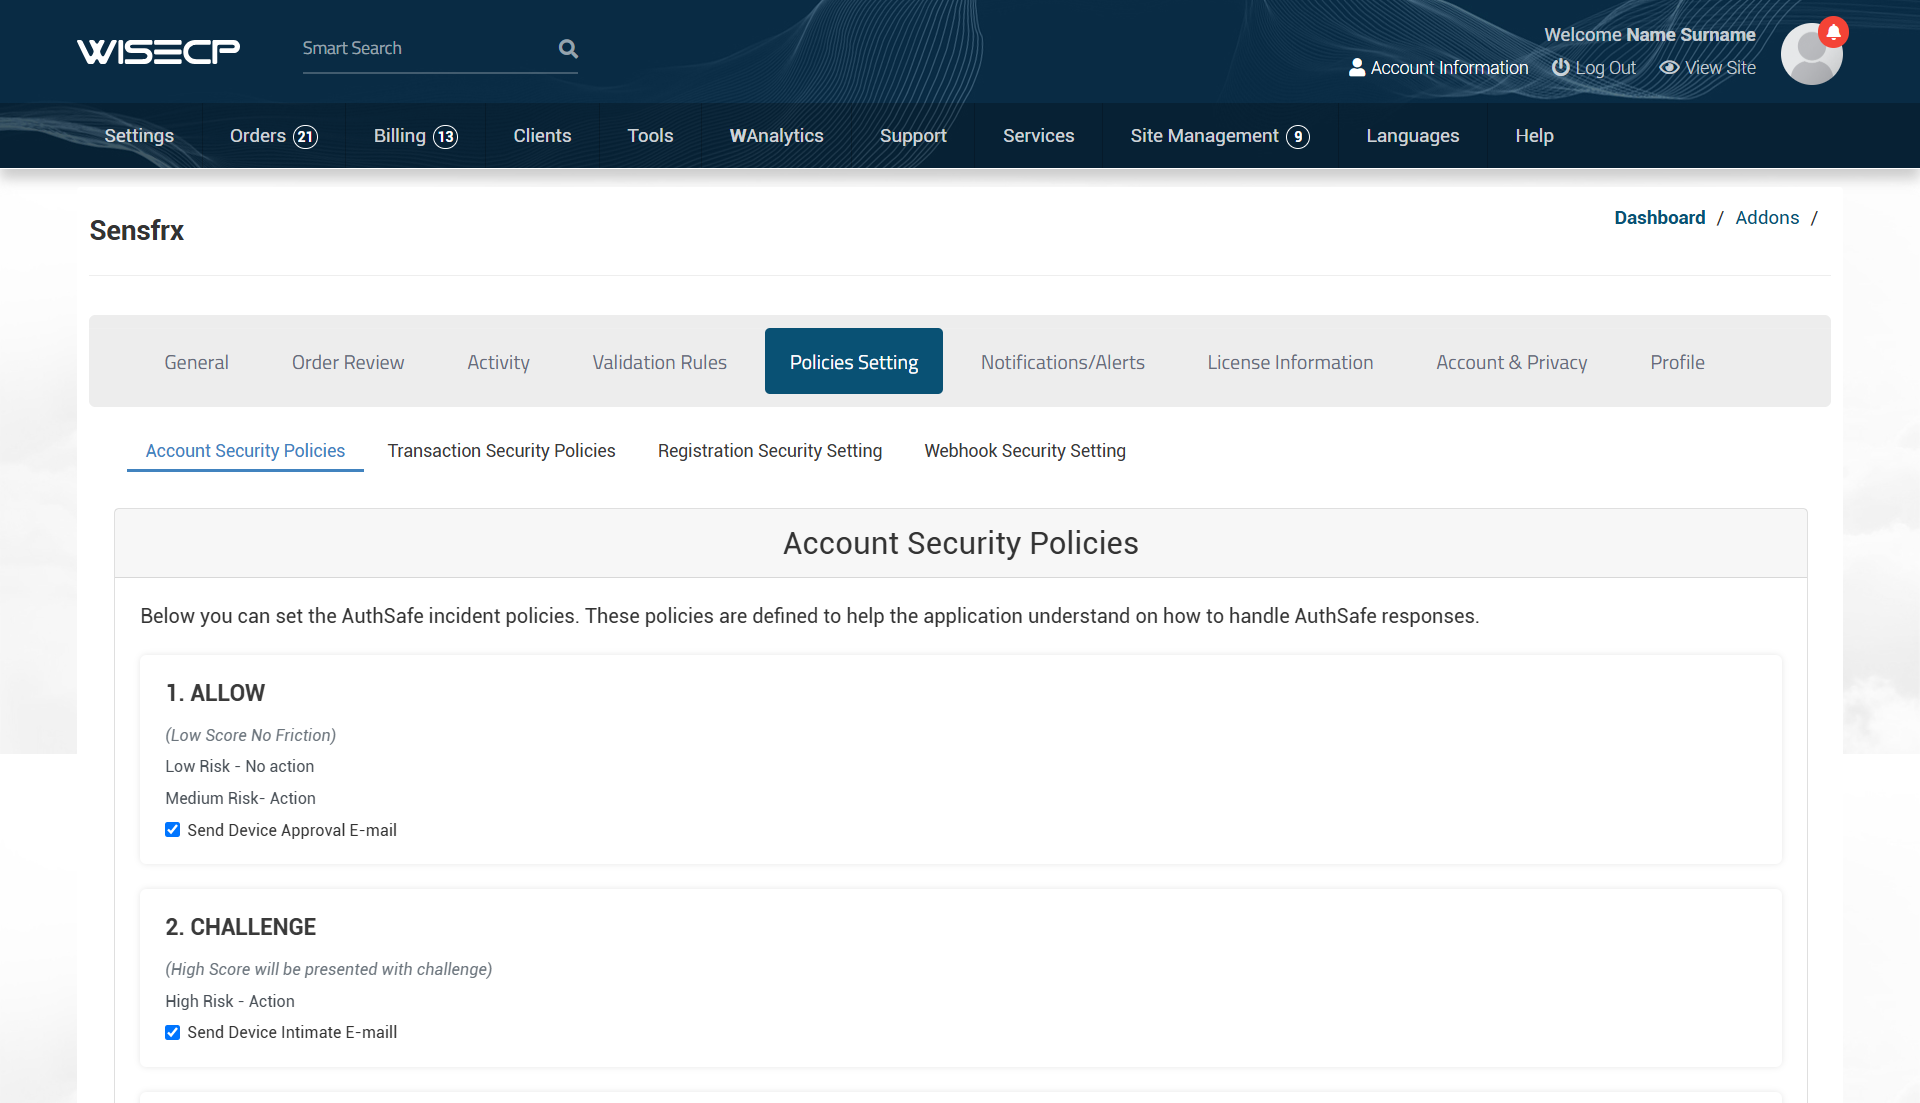
Step 3: Configure Fraud Policies
1. To setup the Sensfrx policy go to top Nav bar and navigate to the Tools > Addons > Sensfrx.
2. Click on the Policy Settings option. Here, you can customize the policies according to their needs, enabling the application to effectively manage Sensfrx response.
Reference Link
Sensfrx Login Page - https://client.sensfrx.ai/
Sensfrs Sign Up Page - https://client.sensfrx.ai/signup
Sensfrx WISECP Plugin Page - https://marketplace.wisecp.com/en/products/search?q=sensfrx
Video Link
WISECP Plugin Integration Video - https://youtu.be/rKEocweB_kM
Sensfrx Dashboard Explanation Video - https://youtu.be/uomr7g9GrBY